10 Essential Steps to Install Your Home Energy Storage System
2025-08-27
Introduction — why installation is the part that makes or breaks value
Buying a battery is the easy part. Installing it so the system delivers the savings, resilience and lifespan you expect — that is the hard part. Even a perfectly installed battery is useless if its capacity is too small for your needs, installed in a hot closet, or tied to a panel that trips under load. Good installation turns capacity into usable hours and promise into performance. Bad installation turns capital into regret.
This guide treats installation as a technical project and a homeowner decision: you’ll get practical steps, numbers you can use, a small calculator, and real-world pitfalls to avoid.
Step 1 — define what you want the system to do
Start with outcomes, not brands. Ask yourself:
- Do you want backup power for a few critical circuits during outages?
- Do you want bill savings by shifting from peak to off-peak rates?
- Is your priority solar self-consumption, storing midday PV for evening use?
- Are you preparing for future growth (EV charging, heat pump, more occupants)?
Answer honestly. For example, if your aim is a 24/7 fully off-grid life, the strategy and cost are entirely different from wanting three hours of critical backup during storms. Define one primary objective and one or two secondary objectives. That clarity will shape capacity, inverter choice, and budget.
Step 2 — gather accurate household load data
How to gather the data:
-
Collect 12 months of utility bills if available. Look for kWh per month and any time-of-use (TOU) breakdown.
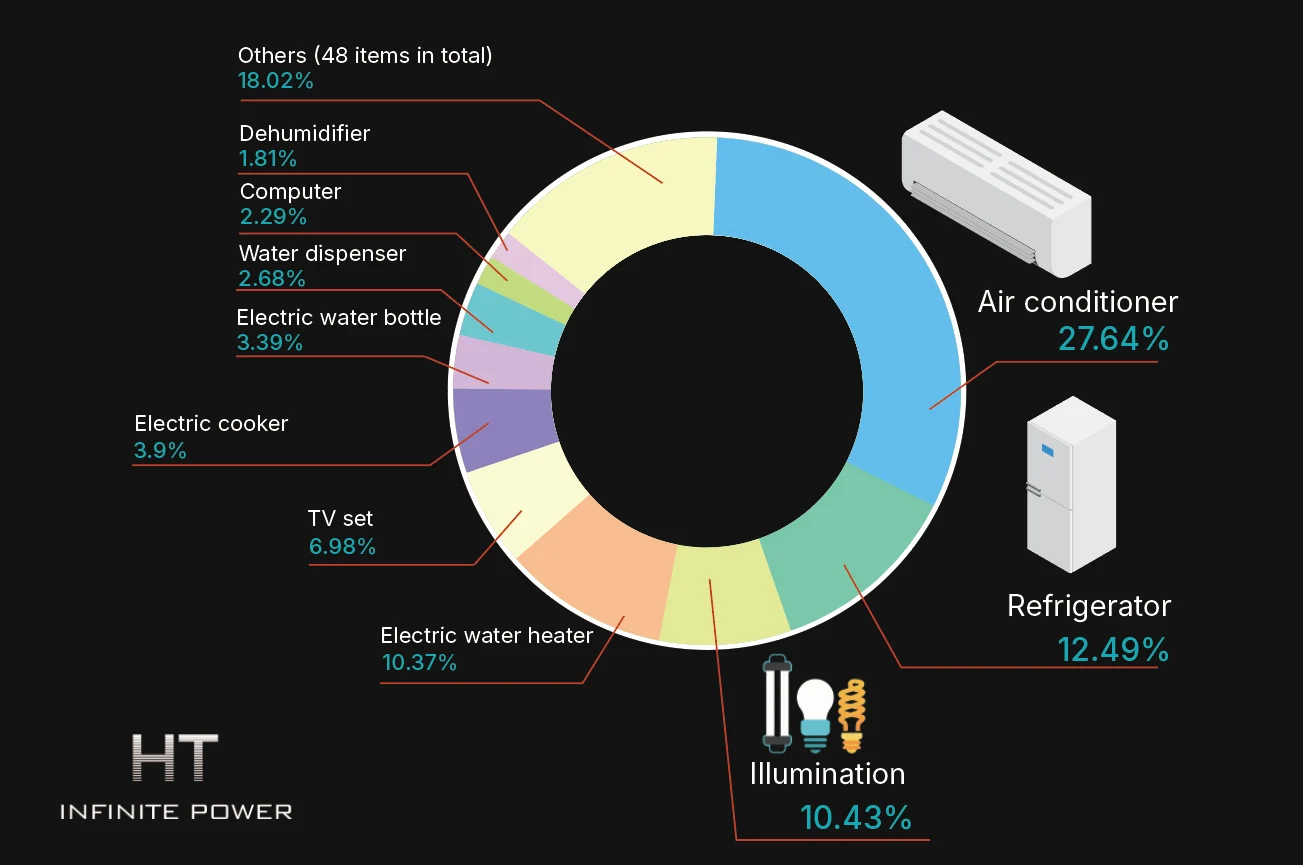
- If your meter or utility provides hourly data (many do), export it. If not, use a smart meter or temporary energy logger on the mains for 7–14 days.
- Make a simple load list: fridge, freezer, HVAC, hot water, oven, EV, lighting, electronics. Record typical power draw (W) and estimated hours per day.
Why this matters:
Sizing a battery off a rough “average daily kWh” tends to under- or over-spec the system. The difference of a few kWh changes both cost and utility.
Step 3 — pick battery chemistry and inverter topology
Battery chemistry (real tradeoffs)
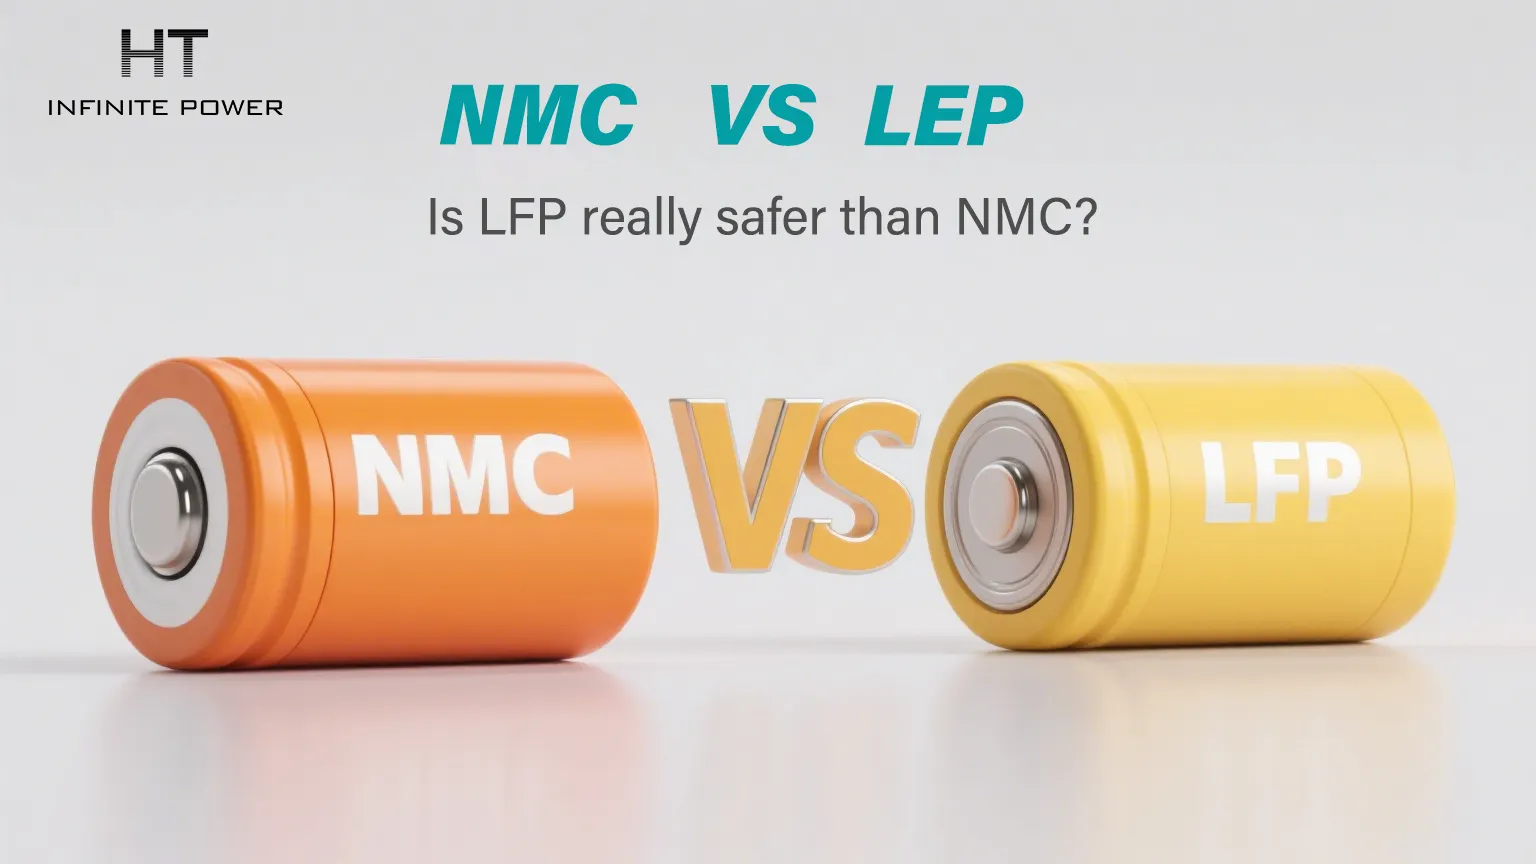
- LFP (LiFePO4) — longer cycle life, stable at higher temperatures, safer thermal behavior. Great for residential use focused on lifecycle cost.
- NMC / NCA — higher energy density; smaller footprint but often shorter cycle life and somewhat higher cost per cycle.
- Flow / lead-acid / emerging tech — niche use cases; flow for long-duration, lead-acid for low-cost backup (but shorter lifespan).
Rule of thumb: For most homes, LFP balances safety, lifetime and cost per cycle best.
Inverter topology
- Hybrid / AC-coupled — common for adding batteries to existing solar. Flexible.
- DC-coupled — fewer conversions (PV → battery → load), slightly better round-trip efficiency; ideal in new installations designed from scratch.
- Bi-directional inverters are essential if you plan to do vehicle-to-home (V2H) later.
Step 4 — calculate required battery capacity (calculator included)
You need a simple, defensible sizing method. Below is a compact calculator you can use. It’s conservative and practical.
Battery sizing formula
Calculateur de taille de batterie
Besoins en kWh nocturnes:Variables explained
- Nightly_kWh_need: your household’s typical energy use during the time you want to cover (e.g., 18:00–07:00).
- Backup_days: number of days you want autonomy for (1 for single-night backup, 2–3 for storm resilience).
- Usable_DoD: fraction of the rated battery you’ll use without damaging life (e.g., 0.8 for 80% usable).
- System_efficiency: round-trip efficiency (e.g., 0.90 for 90%).
Example calculation
- Nightly_kWh_need = 8 kWh
- Backup_days = 1 (single-night backup)
- Usable_DoD = 0.80
- System_efficiency = 0.90
Battery_kWh = (8 × 1) ÷ (0.8 × 0.9) = 11.11 kWh
Sizing notes
- If your priority is peak shaving rather than outage backup, size for average discharge per cycle rather than total nightly need.
- If you have an EV, add the EV nightly requirement to the nightly_kWh_need or plan separate charging schedules.
Step 5 — inspect and prepare electrical infrastructure
Battery systems are heavy electricity equipment. Don’t assume your house is ready.
Checklist
- Main service panel ampacity (100A, 200A, 400A?). A 200A panel is standard in many newer homes and offers headroom.
- Space for new breakers and transfer switches.
- Earthing/grounding condition — older homes often need upgrades.
- Physical route for DC/AC cable runs — long runs add losses and cost.
- Does your utility require a dedicated revenue meter or anti-islanding equipment? (Check local interconnection rules.)
Hidden reality: Replacing an old panel or upgrading the service can add $1,000–$5,000 to your project. Factor that in early.
Step 6 — site selection, thermal management and mounting options
Indoor vs outdoor
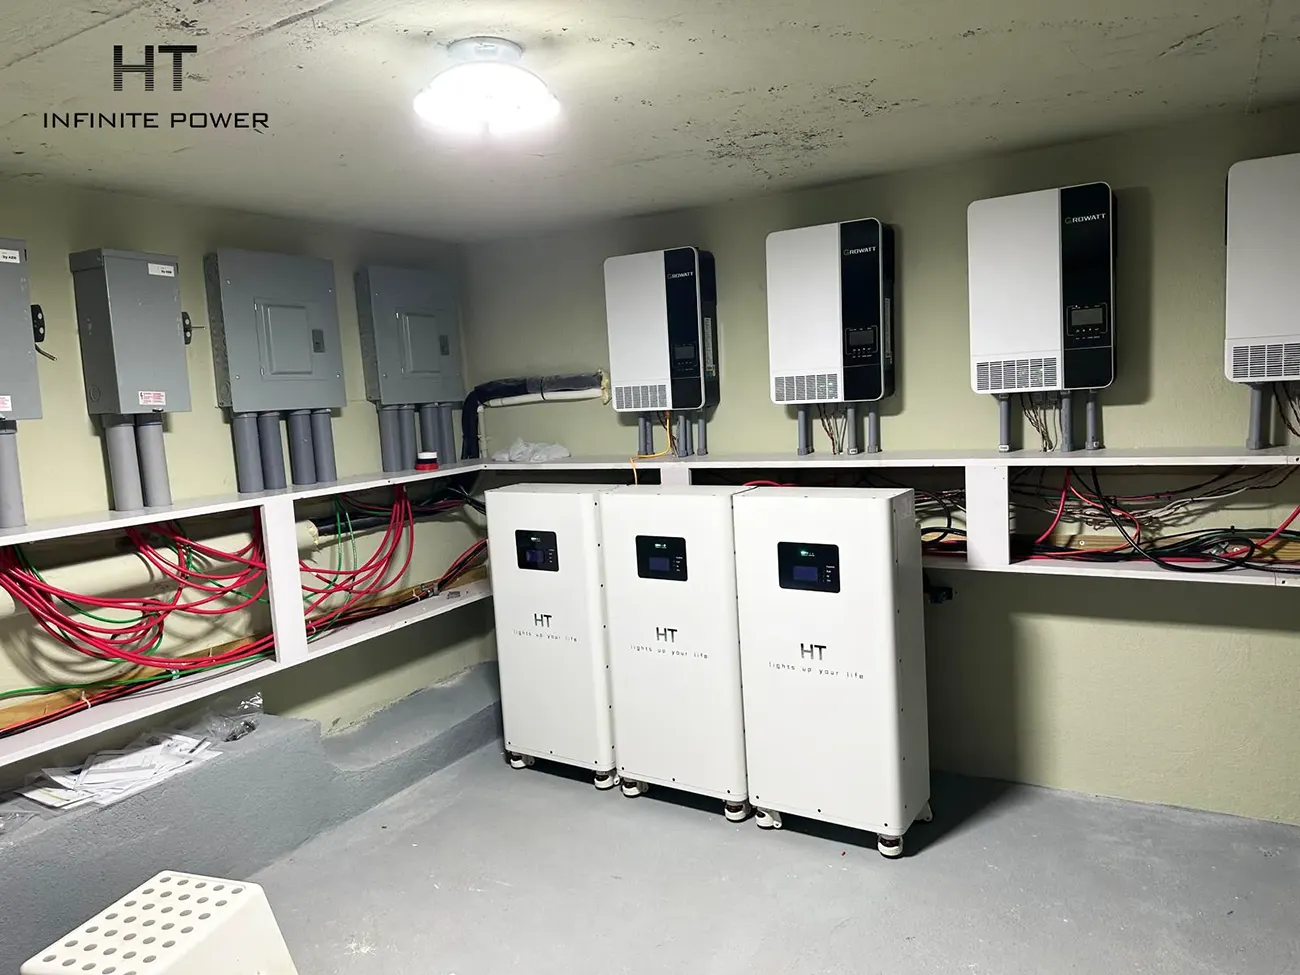
- Indoor (garage, utility room): stable temps = longer life; better security; may require ventilation.
- Outdoor (IP65 cabinet): saves indoor space but needs weatherproofing and sun shading.
Thermal management
- Batteries dislike extremes. If you live in a hot climate, an outdoor shaded enclosure plus active cooling might be needed. In cold climates, consider insulated housings or indoor placement.
Vibration, flood risk and theft
- Avoid basements that flood. Bolt cabinets to the slab or wall. Consider tamper alarms if theft is a local risk.
Step 7 — permits, interconnection and safety standards to check
Regulatory steps are not optional.
Typical permitting and standards
- Building permit from the local authority.
- Electrical permit and inspection.
- Compliance with standards: UL 9540, UL 1741 (US), IEC 62933 / EN standards (EU), or local equivalents.
- Fire department approval in some jurisdictions — e.g., access and labeling for firefighters.
- Utility interconnection agreement and anti-islanding protection.
Tip: Start the permitting process early. Some utilities take weeks to approve interconnection, and inspections can delay commissioning.
Step 8 — installer selection, contract items and warranties
A battery is as good as the design and installation.
How to vet installers
- Ask for three references and recent installations in your climate.
- Confirm certifications (e.g., NABCEP, local electrician license, battery manufacturer-certified installer).
- Check warranty terms: battery module warranty, performance warranty (kWh throughput or % capacity at X years), inverter warranty.

Contract must-haves
- Clear scope: equipment make/model, capacity, inverter type, monitoring app.
- Installation timeline and payment schedule.
- Performance acceptance test criteria.
- Warranty and liability clauses, including who maintains which parts.
- Change order process and estimated costs for foreseeable add-ons.
Beware: Low bids often omit critical items—conduit runs, panel upgrades, or fire-rated enclosures. Get a line-item quote.
Step 9 — commissioning, acceptance testing and documentation
The commissioning day is when money becomes performance.
Essential commissioning checks
- Verify nameplate ratings vs installed equipment.
- Verify communication: inverter ↔ battery BMS ↔ monitoring cloud.
- Test automatic transfer to backup loads and safe shutdown.
- Load test: run the battery under expected loads for a set period (e.g., 1–2 hours) and log performance.
- Check efficiency numbers and round-trip loss (should align with spec within tolerance).
Documentation to require
- As-installed single-line diagrams.
- Operation manual and emergency shutdown procedure.
- Warranty certificates and serial numbers for each module.
- Commissioning report with actual tested results.
Step 10 — monitoring, maintenance and updating your plan
Installation isn’t the finish line; it starts the operational phase.
Monitoring
- Use the vendor app or an independent EMS (energy management system) for alerts and performance tracking.
- Track State of Charge (SoC) trends and cycle counts monthly.

Maintenance
- Visual inspection every 6–12 months: enclosure seals, wire temperature, signs of corrosion.
- Software updates: ensure secure updates via authenticated channels.
- Replace consumables (e.g., contactors) per manufacturer schedule.
Updating
- Revisit settings annually: rates change, household demand changes. Adjust charge/discharge schedules accordingly.
Cost snapshot: hardware vs labour vs hidden costs
Here’s a practical cost table (illustrative regional median — use your local costs to adapt):
| Cost Item | Typical range (USD) | Notes |
|---|---|---|
| Battery pack (10–13.5 kWh LFP) | $4,000–$8,000 | Depends on brand and usable kWh |
| Inverter / hybrid controller | Inverter / hybrid controller | Higher for bi-directional, V2H ready |
| Electrical upgrades (panel, breakers) | $800–$4,000 | Older homes at higher end |
| Installation labour | $1,000–$3,000 | Complexity and wiring length affect cost |
| Permits & inspections | $200–$800 | Varies by jurisdiction |
| Monitoring & commissioning | $200–$800 | Includes software setup & load testing |
| Estimated total | $7,200–$19,600 | Typical residential range |
Takeaway: Hardware is usually 50–70% of cost; labour, upgrades and permits are the remainder. Don’t underbudget upgrade costs.
Illustrative case study — a composite household install in two climates
Composite Case A — Coastal Mediterranean home (solar + resilience focus)
- Rooftop PV: 6 kWp; household daily use: 18 kWh; evening peak: 6–9 kWh.
- Objective: increase self-consumption and provide 4–6 hours of backup during summer storms.
- Chosen system: 13.5 kWh usable (LiFePO4), hybrid inverter (DC-coupled), indoor garage install for thermal stability.
- Outcome: self-consumption rose from 45% to 82%; during a multi-hour grid outage, critical loads ran for 6 hours; ROI projected ~8 years with current tariffs.
Composite Case B — Suburban monsoon climate (backup priority)
- No PV; grid unreliable during rainy season; household nightly need for critical loads: 8 kWh.
- Objective: backup for 48 hours for critical loads (fridges, medical equipment, comms).
- Chosen system: modular approach — start with 12 kWh + plan to add a second module for full 24-hour autonomy. Inverter: off-grid capable with automatic transfer switch.
- Outcome: staged investment allowed the homeowner to defer half the cost and add modules after seeing actual outage patterns.
Why composite? These two examples illustrate different objectives (self-consumption vs backup) and the resulting installation choices. The modular route gives staged spending flexibility, while the integrated route is simpler if needs are stable.
Common mistakes and how to avoid them
- Mistake: Under-sizing because of average vs peak confusion.
Fix: Use hourly load profiles and size for peak backup needs or peak shaving intent.
- Mistake: Ignoring thermal conditions.
Fix: Place batteries where temperature swings are limited; factor active cooling in hot climates.
- Mistake: Picking equipment before understanding permits.
Fix: Check local interconnection and fire codes first—some models require specific clearances or labeling.
- Mistake: Using un-certified installers to save $500.
Fix: Pay for certified installation and clear warranties; warranty claims often require certified installation
Conclusion — a printable checklist
Here’s a short checklist to carry into vendor meetings:
- Primary objective defined (backup / savings / self-consumption)
- Hourly load data available (7–14 day logger or utility export)
- Chosen chemistry and inverter topology documented
- Sizing calculation done and validated (use the calculator above)
- Panel / service capacity verified or upgrade budgeted
- Permits and utility interconnection requirements checked
- Installer vetted, contract signed with acceptance tests specified
- Commissioning test performed and reports filed
- Monitoring in place and maintenance schedule set
Keep this checklist with installation invoices and the commissioning report—those documents are often needed for warranty claims and insurance.
Frequently Asked Questions
Q1 — Can I install a home battery myself?
Legally, perhaps — but installing a battery requires electrical work, interconnection paperwork, and safety compliance. DIY can void warranties and cause hazards. For most homeowners, a certified installer is recommended.
Q2 — How long until the battery pays back?
Typical payback ranges 6–12 years, influenced by electricity rates, incentives, cycling frequency, and whether you pair the battery with solar.
Q3 — What lifespan should I expect?
LFP batteries often reach 10–15 years with useful capacity retained; many manufacturers guarantee capacity for X years or Y cycles.
Q4 — Do batteries need ventilation?
Yes — batteries and inverters produce heat. Enclosures should allow heat dissipation; some installations in very hot climates require active cooling.
Q5 — Will my insurance cover a battery system?
Policies vary. Notify your homeowner insurer before installation; some require updated policy details or have specific storage exclusions.
5 Battery Maintenance Tips to Extend Your Energy Storage Lifespan
What Are the Cost Differences Between Integrated and Modular Energy Storage Systems?